This video provides instructions for the for Service Tray (sled) removal and installation.
The Callisto service tray is a consumable and will periodically need to be replaced. This video covers the steps for removing and installing a service tray.
Before removing the service tray, make sure media has been removed from the printer and the printhead is in the up and capped position. Access the service tray on the media entrance side of the printer. You may want to remove the printer side panel for easier access to the tray.
To access the service tray for removal, touch the Support Tools icon on the printer Operator Panel. Expand the Maintenance Menu and then expand the Service Tray menu. Touch Remove from the menu to see the Remove Service Tray view.
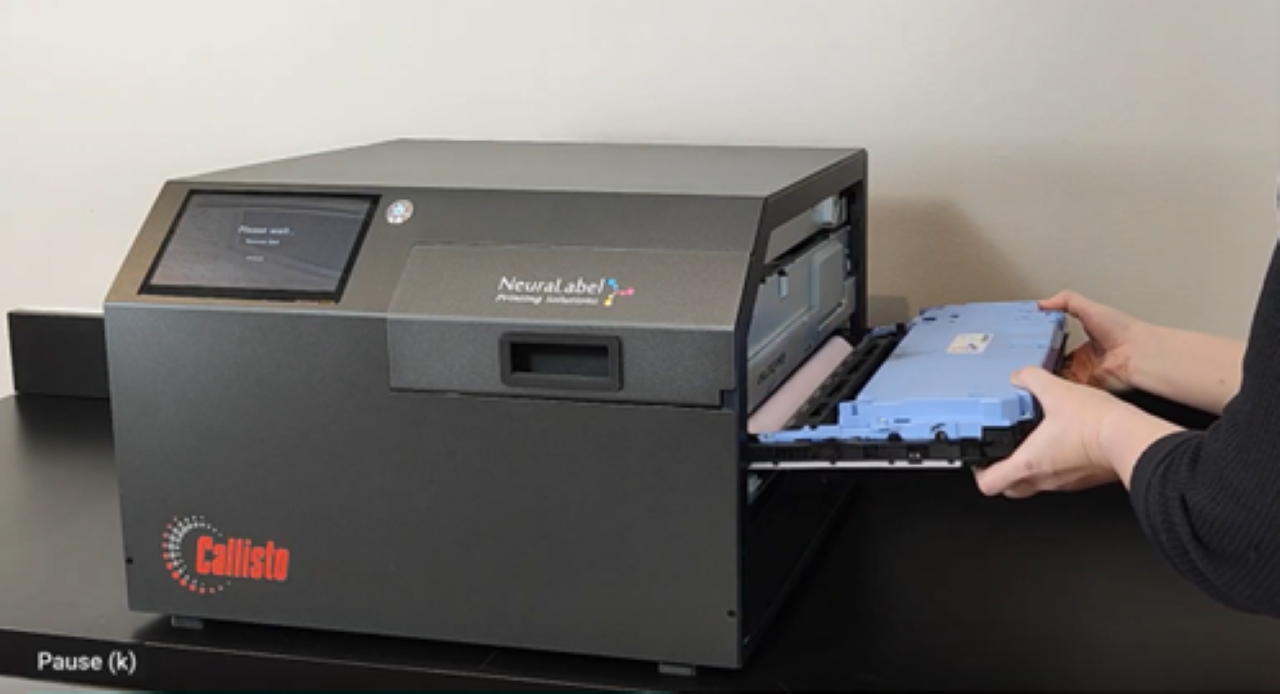
To remove the service tray, hold down the tray stop lever, which raises the tray stop. While holding down the lever, select the Eject button from the Operator Panel. You will see the blue service tray eject until it stops near the right side, or paper entrance side, of the printer.
Once the service tray is accessible, use two hands to gently pull to remove it from the printer. The tray will likely have wet ink on it, so be prepared to dispose of it properly.
Keep in mind that while the service tray is removed, the printhead is uncapped. Never leave the printhead uncapped for more than a few minutes as this could dry out the ink nozzles and damage the head. If for some reason a new service tray is unavailable, be sure to return the original tray to the printer.
To install a new service tray, remove the new tray from its packaging and remove any blue packaging tape. The tray installs with the blue side up and the light pink cloth side going into the printer first.
Install the service tray by touching the Support Tools icon from the printer Operator Panel. Expand the Maintenance Menu and then expand the Service Tray menu. Touch Install from the menu to see the Install Service Tray view.
Hold down the tray stop lever so the tray stop is out of the way and place the new service tray in the printer by sliding it into the tray tracks until it comes to a stop, with about 1 inch of the service tray remaining out of the printer. Select the Install button and gently apply pressure to the tray until it is grabbed by the printer and pulled completely into its track. When the service tray stops moving, it is completely installed. If you are installing a new service tray, select Yes in the message that appears to calibrate the new tray.
Be sure the tray stop lever is up and tray stop is down after the service tray is installed. You have now completed the service tray installation. Remember to replace the printer side panel if it was removed. You are now ready to use your Callisto printer. Contact Neuralog if you need further assistance.
Keywords: Service Tray, Service Sled, Wiper Sled, Maintenance Sled

